Having trouble submitting? Email us directly at nicole@beaway.com and we'll get back to you within 24 hours.











Tail Lift Electrical Fault Guide: Battery, Wiring & Control Panel
A tail lift electrical fault often stops a lift from responding even when the hydraulic system works fine. A hydraulic fault usually shows up as slow or weak movement. An electrical fault typically shows no response at all — no motor sound, no light on the control panel, or a remote that does nothing. Diagnosing it starts with narrowing down three areas: the battery and power supply, the wiring and connections, or the control panel and remote unit.
A common situation in the industry involves a driver pressing the up or down button and getting nothing back — not even the faint hum of the pump motor trying to engage. Many operators assume the hydraulic pump has failed. In reality, the fault often sits upstream in the electrical circuit. Fleet teams generally check the electrical side first, before touching any hydraulic component, simply because it is quicker and cheaper to rule out.

How to Tell If a Tail Lift Electrical Fault Is the Cause
The clearest signal of an electrical fault is a complete absence of motor activity. If the pump motor stays silent and no indicator lights respond, the fault is very likely electrical rather than hydraulic. If the motor runs but the platform does not move, or moves slower than usual, the cause more likely lies in the hydraulics — low fluid, a worn seal, or a blocked line.
A simple first check covers what you can see and hear: motor silence and dark indicator lights point toward electrical causes; motor noise with poor or no platform movement points toward hydraulic causes. This one distinction saves significant diagnostic time, since electrical and hydraulic faults need entirely different tools and procedures.
Three sub-systems account for most tail lift electrical faults:
- Battery and power supply — the source feeding the whole circuit
- Wiring and connections — the pathway carrying current to the motor and controls
- Control panel and remote unit — the interface that triggers the motor
Tail lift circuits typically run on a 12V or 24V vehicle supply. Testing the wrong section first can waste time on a component that was never faulty. A structured approach works better: check the power source first, then the wiring path, then the control interface. This order usually reaches a conclusion faster than swapping parts on a trial-and-error basis. It also avoids a common mistake — assuming a “no response” fault must be mechanical simply because nothing visibly moves.
Tail Lift Battery and Power Supply Issues
The battery is the starting point for almost every electrical diagnosis. A weak or poorly connected power source can mimic several other faults. A tail lift draws a relatively high current when the motor engages. Even a partially discharged battery may still power the indicator lights while failing to deliver enough current to start the motor — a pattern that technicians often mistake for a control panel fault.
Common Causes of Battery Drain and Corrosion
Battery drain commonly links to prolonged inactivity, a parasitic draw from another vehicle circuit, or a battery nearing the end of its service life. Battery corrosion at the terminals is a separate and equally common cause. A build-up of white or greenish deposits raises resistance at the connection point. This can cut current flow enough to stop the motor from starting, even when the battery itself tests as charged.
Battery age is also a factor worth checking. Lead-acid batteries used in commercial vehicles generally lose capacity gradually rather than failing all at once. A battery may still start the vehicle engine while no longer holding enough reserve capacity to power a tail lift motor, which draws a heavier load over a short burst. This explains why a tail lift fault can appear suddenly on an older vehicle with no other electrical warning signs. Where the vehicle has a separate leisure or auxiliary battery for the tail lift circuit, test that unit independently from the main starter battery — the two do not always fail at the same time.
How to Check the Battery and Fuses
Follow this short checklist at this stage:
- Confirm the battery voltage with a multimeter while the system sits at rest
- Inspect both terminals for corrosion, looseness, or discoloration
- Check the main fuse and any inline fuses in the power feed for continuity
- Re-test motor response after cleaning terminals and securing the connection
Pay close attention to fuses. A tail lift blowing fuse repeatedly, rather than just once, usually points to a downstream short rather than a fuse quality issue. That pattern shifts the inspection toward the wiring stage rather than the battery itself.
Tail Lift Wiring and Connection Faults
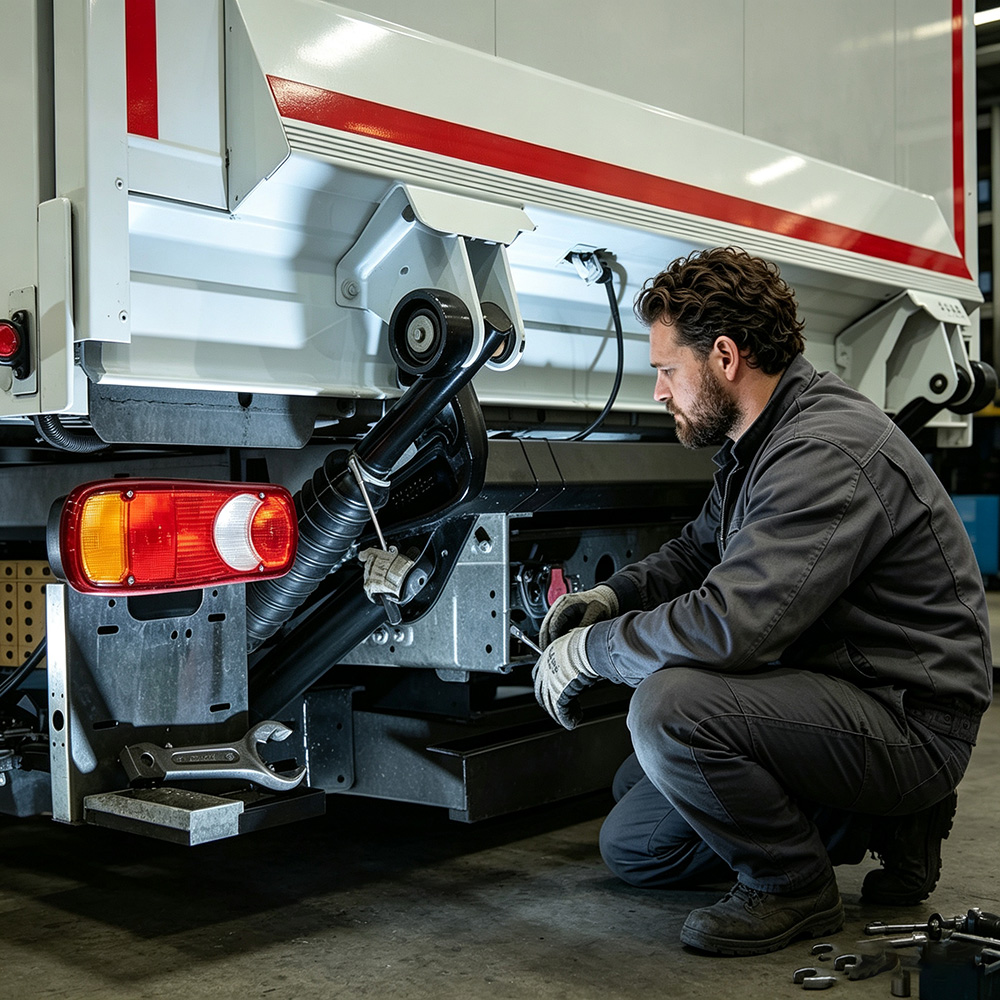
Wiring faults hide more easily than battery issues and often develop gradually. They commonly cause intermittent electrical faults — problems that appear only sometimes, such as a lift that works normally most days but occasionally fails to respond. Vibration from road use, moisture exposure, and general age drive most wiring degradation on commercial vehicles.
Why Wiring Faults Cause Intermittent Problems
A loose or corroded connector can behave inconsistently. Current may pass when the connector sits in good contact and fail when vibration shifts it slightly. This explains why a single test showing normal voltage does not always rule out a wiring fault — the same connection can fail again once the vehicle returns to the road.
Solenoid problems and relay problems usually group with wiring faults, since both sit within the same control circuit between the battery, the switches, and the motor. A failed solenoid may produce no audible click when the button is pressed. A working solenoid usually gives a distinct click as it engages — a useful sound to listen for during testing.
Moisture ingress affects tail lift wiring specifically, since the circuit typically runs along the underside or rear of the vehicle chassis. This location sees regular exposure to road spray, washing, and weather. Poorly sealed connectors can let moisture enter over time, causing internal corrosion that stays hidden from the outside of the connector housing. Technicians often find this type of fault only after opening and disconnecting a connector. For this reason, persistent intermittent faults that survive a basic visual check usually call for disconnecting and re-seating each connector along the circuit, rather than relying on appearance alone.
How to Inspect Wiring and Connectors
Always start with a visual check before any electrical testing. Physical damage — chafing, pinched cable runs, or exposed conductors — is often visible without instruments and can shortcut the whole process.
Follow this short sequence for this stage:
- Trace the wiring path visually from the battery to the control unit and motor
- Check each connector for corrosion, moisture residue, or looseness
- Disconnect and re-seat any connector that shows resistance when moved by hand
- Listen for the solenoid click when the button is pressed, to confirm the signal reached the motor circuit
Tail Lift Control Panel and Remote Faults
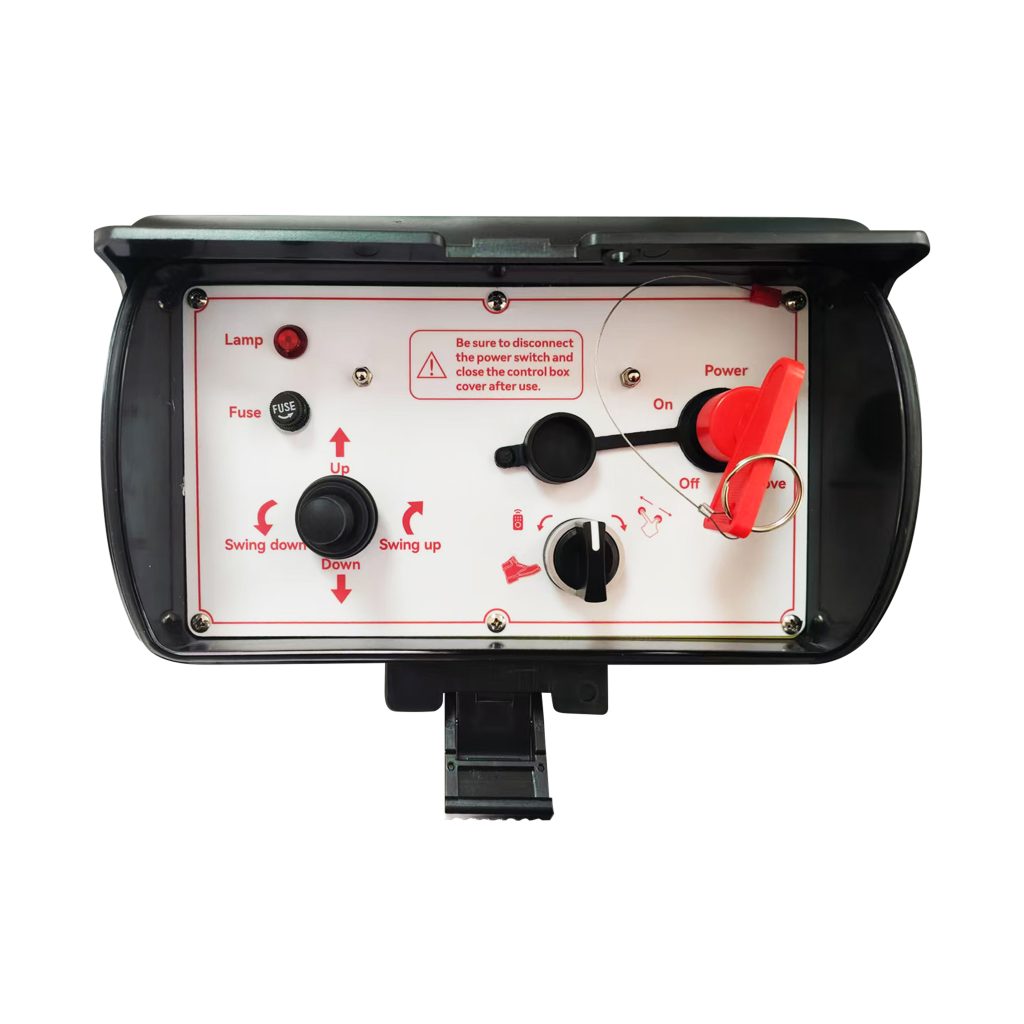
When the battery and wiring both test normally but the lift still fails to respond, the fault usually sits in the control interface itself. Tail lift buttons not working and a tail lift remote control not working share overlapping causes: worn switch contacts, internal moisture ingress, or a damaged circuit board inside the control unit.
Diagnosing Button and Panel Faults
A tail lift control panel not responding at all — no lights, no sound, nothing — differs from a panel where some functions work and others do not. A fully unresponsive panel more often traces back to the power supply stage covered above. A partially responsive panel, for example where “up” works but “down” does not, more often points to a fault isolated to one specific switch or wire within the control unit.
A distinct scenario deserves its own note: tail lift motor runs but won’t lift, combined with a normal-sounding button press. This combination generally rules out the control panel and points toward the hydraulic system or the solenoid valve, since the electrical signal clearly reached the motor.
Diagnosing Remote Faults
Remote units add a wireless link that wired controls do not have, so they need a separate check. A remote that fails to respond should first get checked for a simple flat internal battery — by far the most common cause, and one operators often overlook because they assume a more serious fault. If a wired backup button works normally while the remote does not, the fault sits specifically in the remote unit or its receiver rather than the wider electrical circuit. That narrows the repair to a single, low-cost component instead of a broader inspection.
Electrical vs Hydraulic Tail Lift Fault: Quick Diagnostic Table
Tail lift electrical vs hydraulic fault confusion causes some of the most frequent misdiagnoses in the industry. A simple symptom-based reference helps before anyone attempts further disassembly.
| Symptom | Likely Cause | Recommended Action |
|---|---|---|
| No motor sound, no panel lights | Battery discharged or disconnected | Test battery voltage; check main fuse and terminal condition |
| Panel lights on, but no motor response | Control panel switch or internal wiring fault | Inspect button contacts and internal wiring; test solenoid click |
| Motor runs, platform does not move | Hydraulic — low fluid or worn seal | Refer to hydraulic fault guide; not an electrical issue |
| Works intermittently, fails at random | Loose or corroded connector, wiring fatigue | Visually inspect wiring runs; re-test after securing connections |
| Fuse blows repeatedly | Short circuit downstream in wiring | Trace circuit for damaged insulation before replacing fuse again |
| Remote unresponsive, wired button works | Remote battery or remote receiver fault | Replace remote battery first; test wired backup if fitted |
Is my tail lift fault electrical or hydraulic? As a general rule, silence favors an electrical cause, while noise without movement favors a hydraulic one. This single distinction resolves most first-pass diagnostic questions before anyone removes a component.
Manufacturer maintenance documentation commonly separates fault categories along these same lines. Many list “motor runs slowly” and “lift will not lower” under distinct electrical and hydraulic headings — a structure that reflects long-standing industry consensus on how technicians typically classify tail lift faults during servicing.
Frequently Asked Questions
How do I test a tail lift battery? Use a multimeter across the terminals with the system at rest, then again while attempting to operate the lift. A voltage drop under load, even when resting voltage looks normal, often signals a battery that cannot sustain current under demand.
How do I check a tail lift fuse? Locate the main power fuse near the battery connection and any inline fuses along the control circuit. A continuity test with a multimeter confirms whether a fuse has blown; visual inspection alone can mislead on some fuse types.
Is my tail lift fault electrical or hydraulic? If the motor produces no sound and no panel lights respond, the fault is most likely electrical. If the motor runs audibly but the platform fails to move or moves weakly, the fault more likely lies in the hydraulics.
Why does my tail lift work intermittently? A loose, corroded, or vibration-damaged connector somewhere along the wiring circuit causes most intermittent faults, rather than one component failing outright. The connection may pass current inconsistently depending on vehicle movement.
A tail lift electrical fault usually narrows down through a short sequence: confirm power at the battery, check the wiring path for damage or loose connections, then isolate the control panel or remote as the final step. Readers should treat the table above as a starting reference rather than a final diagnosis, and confirm findings against their own unit’s condition before further disassembly. For faults where the motor engages normally but the platform still fails to lift or lower correctly, Tail Lift Won’t Go Up? 8 Causes & On-Site Fixes and Tail Lift Won’t Lower? 7 Causes & Fixes cover the hydraulic side of these same symptoms in more detail.
Suggested image: a labeled photo of a tail lift control panel or battery terminal connection. Suggested alt text: “tail lift electrical fault diagnosis at control panel and battery terminal”
Trusted by Fleet Operators Across 60+ Countries
Stop Losing Time at the Loading Dock.
Get a Custom-Matched Tail Lift Quote in 24 Hours.
60
Countries Served
24h
Quote Turnaround
99.9
Field Uptime
5.0
Customer Rating
No Obligation
CE & UKCA Certified
Standard & Custom Builds
Worldwide Shipping